Finding a ridiculously cheap Business Class ticket is now simpler than ever. Learn how I found one here, and I bet you can do it too!
Let me first take you back for a second to how it all started. It was one dreary night in September 2017. I remembered I was hanging out on my couch and watching the news on CNN about the raging protests in St. Louis, Missouri.
And all of a sudden, it just reminded me of the good time when I was there back in 2007. It’s been 10 years and I really miss that city. So yeah, that night I just randomly started to take a look at a flight ticket, in hope to get to visit St. Louis.
Little that I know, that night I stumbled upon a dirt-cheap $800 Business Class ticket (round-trip) offered by Star Alliance airlines (Air Canada, United, Lufthansa etc.) from European cities to West Coast US.
I ended up booking a Business Class round-trip ticket from Munich to San Francisco for €739 (~$800) with Air Canada. You can imagine how ecstatic I was that night!
For those of you who don’t know, Air Canada (and all other Star Alliance airlines for that matter) is a full-service airline, and not a so-called low-cost carrier (LCC), which notoriously offers low price in the expense of less (paid) service.
So you can imagine how amazing this deal is, given that you will get pampered for 10+ hours long up in the air. See short impressions of Air Canada’s business class here below (courtesy of When I Travel The World).
So how did I find it? In this post, I am going to try to walk you through the steps that I took. And no, it does not involve hacking airline reservation systems or other malicious illicit activities. And I will try to make things as simple as possible, so you hopefully can learn and try to do it yourself. Here you go!
How I found an $800 Business Class ROUND-TRIP Ticket from Europe to West Coast US
What tools did I use?
Let me start first by explaining what tools I use to search for flight tickets. Searching a cheap Business Class ticket is like trying to find a needle in a haystack. Having a powerful tool is therefore very crucial. Here below are some tools that I always use in the quest for cheap Business Class deals.
#1 – Google Flights
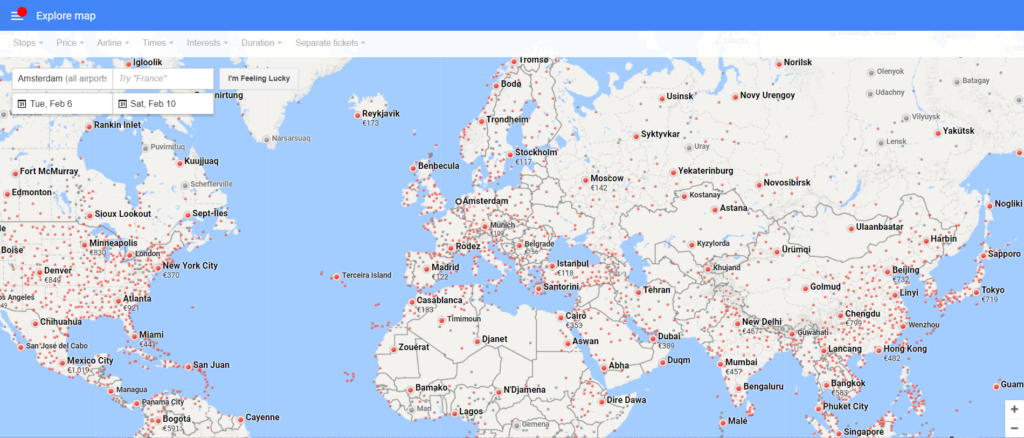
Google Flights is the BEST and MOST POWERFUL search tool, period! The interface is extremely user-friendly, flexible and reliable. The biggest strength of Google Flights is the very insightful visualization to explore destinations using the familiar interface of Google Maps, and the prices are all listed (see here below). This makes it extremely easy to find interesting destinations that may suit your budget and interests.
#2 – Kayak Explore
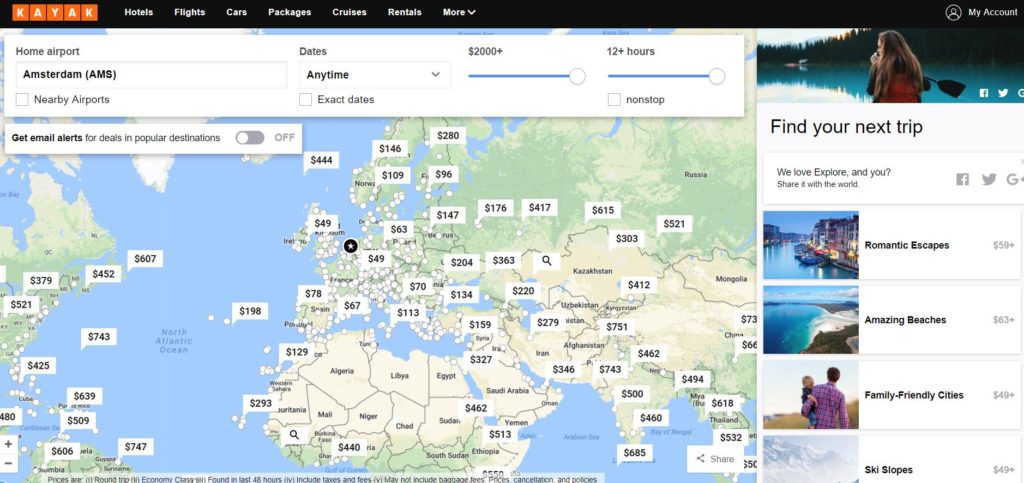
Kayak Explore is a second-best alternative to Google Flights. It has the same kind of visualization to explore interesting destinations. However, it’s not as powerful and easy to navigate as Google Flights. I switch between Kayak Explore and Google Flights every now and then, just to compare if it can provide better insights to find some good deals. I will recommend though sticking to Google Flights as your primary search tool.
#3 – Google/Wikipedia
In case you have difficulty memorizing airport codes by heart, Google or Wikipedia will be very useful to search for airport codes. I will explain further why this is needed in step #1 below.
Get My Quick FREE Travel Checklist!
Subscribe now to get my quick FREE Travel Checklist.
I will also send you latest updates on travel tips, food and other travel stories from around the world!
What are the steps?
Step #1: Insert as many departure and destination points as possible
To start with searching, we need to insert our departure and destination points. Google Flights can search a maximum of 5 departure- and destination airports (not cities).
So for example, if you would like to depart from one of the airports in New York City, you have to enter Newark (EWR), JFK (JFK) and LaGuardia (LGW). If you don’t know these airport codes by heart, you can search this in Google or Wikipedia. Or else, you can just enter New York City as the departure point in Google Flights.
In my case, when finding the $800 Business Class ticket, I would like to depart from the nearby airports from Amsterdam. So I entered the following airports as departure points:
- Amsterdam (AMS)
- Brussels (BRU)
- Munich (MUC)
- Oslo (OSL)
- Stockholm (ARN)
Perhaps you may ask why I also include Oslo and Stockholm. Well, this is one pro-tip secret for you.
Departing from Scandinavian cities generally costs less than departing from airports in mainland Europe (I don’t know exactly why, but this may have something to do with the airport tax). And getting there from Amsterdam would not cost that much, so it’s worth checking if there are good fares available for flights originating from those cities.
As destinations, I’m aware that flying from European airports directly to St. Louis will be much more expensive because St. Louis is not a big hub airport. Instead, I intentionally put my destinations to the big hubs airports, such as:
- Chicago (ORD)
- Houston (IAH)
- Denver (DEN)
- San Francisco (SFO)
- Atlanta (ATL)
Once you have these completed, Google Flights will simply display you the departure & destination combination with the best connecting time, or lowest price (in bold green). But once you reach this phase, don’t stop there, and go straight to step #2A.
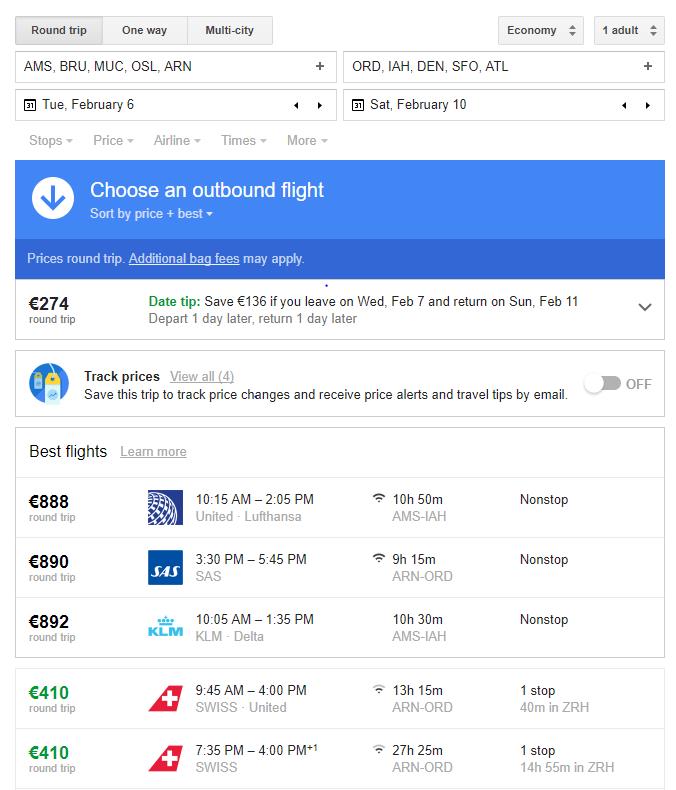
Step #2A: Play around with the departure and return dates
After generating the list with all the prices, you need to play around with the departure and return dates to get even cheaper prices. And don’t worry this will not require a lot of trials and errors.
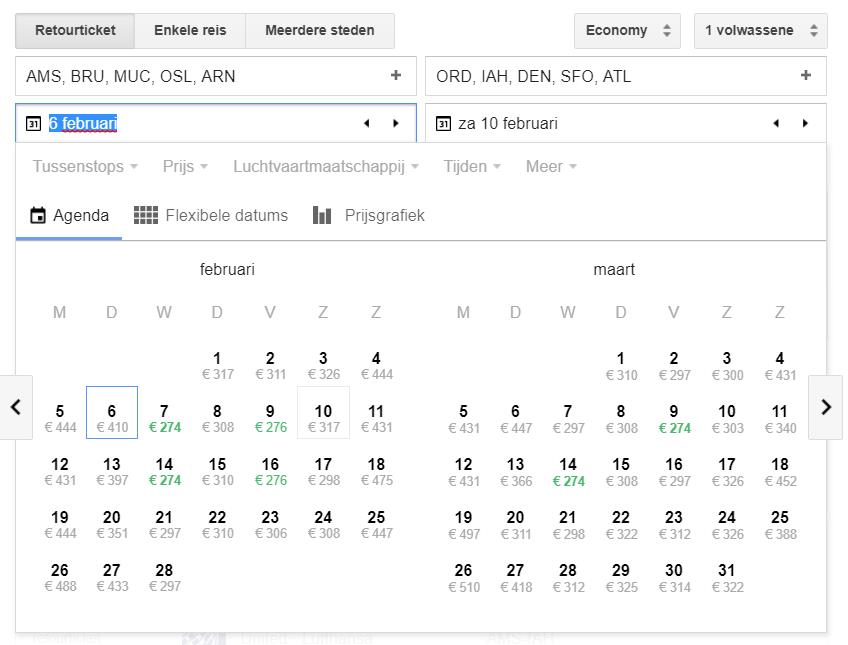
Google Flights is so clever that it gives you already date tips to get the cheapest fare (see here below).
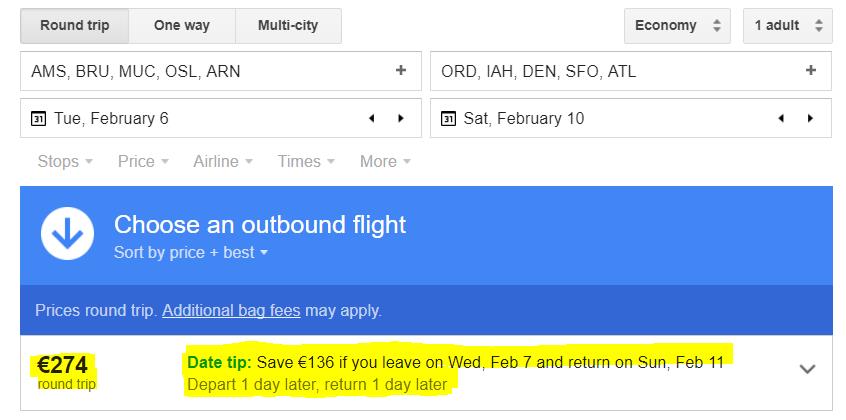
When you select on departure date, Google Flights will also automatically indicate which departure and return dates will be the cheapest to fly (those in bold green).
So after this step, in case you find the deal that you want, go to step #3 right away. Otherwise, see first step #2B.
Step #2B: Set up a price tracker
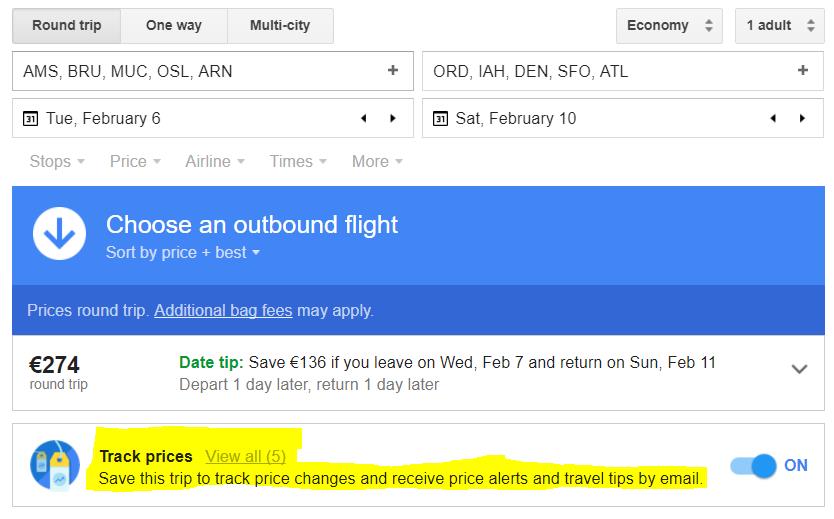
Sometimes you can’t find a deal right away that matches with your budget. Or your period to travel is still far away in the future. In that case, you can set up a price tracker by simply turning the tracker to “On”, so that Google Flights can automatically update you via email if there is a price change. For this, you will need to log in to your Google account.
Step #3: Check where to book the lowest price
Once you find the deal with the lowest price that you want, now it is the time to book it. Unfortunately, you can’t book it via Google Flights. Instead, Google Flights will redirect you to the airline’s website or some OTAs like Expedia or eDreams. This can be found on the very bottom of the page.
As an example, I selected the cheapest fare of €274 in Economy with WOW that Google Flights recommends, departing from Stockholm to Chicago. By the way, this is a very cheap fare to get to Chicago. But in my opinion, this is not necessarily a good deal because WOW is a low-cost carrier (LCC).
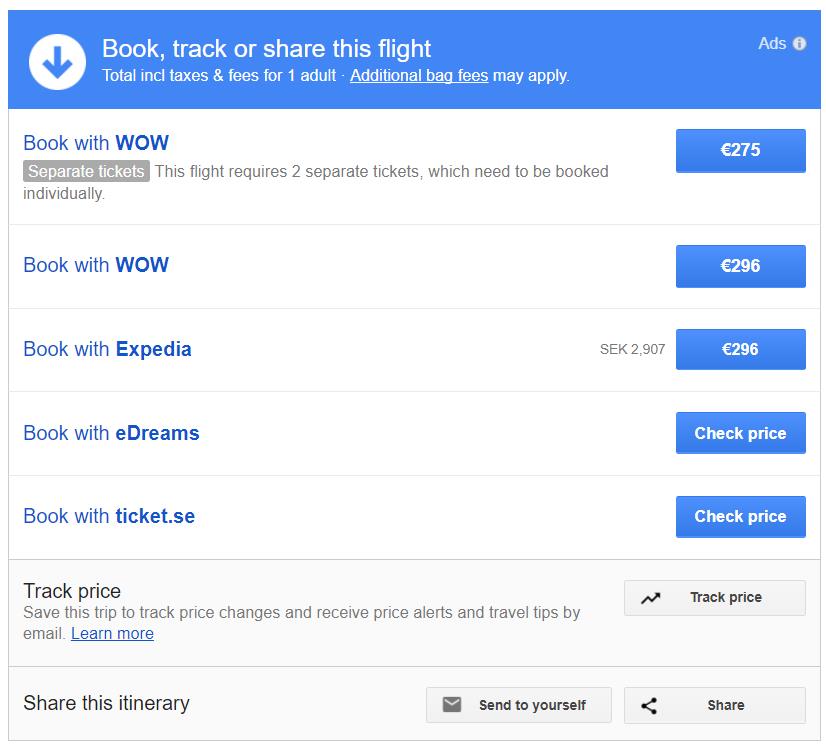
You can go ahead and book it from the airline website or Expedia. But my advice would be to also check other great OTAs such as Kayak and Momondo. A little pro-tip: booking with the airline itself is, however, easier in case you’d like to cancel the flight or you want to rebook it. That way you will deal directly with the airline itself, instead of through third-party OTAs.
Another pro-tip is also to try to check the price in the local currency of the departure point, which is Sweden in this case. The fare can be sometimes cheaper when paid in local currency, rather than in Euro or USD.
Step #4: DON’T WAIT too long and book it right away
In case you find a ridiculously good deal like I did, pull your trigger right away! This kind of deal sometimes often lasts only in a matter of hours, if not minutes.
This is because such a low price might often be caused by a system error in airline pricing or reservation systems (hence the term error fare). Or the airline might want to do a flash sale for an extremely limited amount of time.
The $800 Business Class deal that I was talking about only lasted for 6 hours. Therefore, it’s key to not wait too long and book it right away.
Step #5: NEVER contact the airlines (and I mean NEVER EVER!)
Finally, the last and most important step: after you book the ticket, please never ever contact the airlines.
Why? Because airlines do have the right to not honor the ticket if the super-cheap low fare appears to be an error fare. There are many cases in the past that airlines did this, like what United did with this error fare first class ticket.
So my advice would be to keep it discrete, or only share with people that are closest to you.
———
So there you go! I hope that you can search and find some incredible deals yourself right now.
But before that, I’d like to leave some caveat here. Looking for cheap flights is a tedious, time-consuming process. Every night I literally spend hours to try to find good deals, but this is really because I love doing it. So be patient, and try to enjoy the process. And one day you will reap the reward.
I would love to hear from you if you find this helpful, and if you have further questions. Please do so in the comment below, or send me a message.
Do you like this post and want to receive some more awesome travel hacks regularly? Please make sure that you subscribe to my email newsletter. And also check out my other blog posts for many more helpful tips for traveling. See you in the next blog post and until we Greet again!
Get My Quick FREE Travel Checklist!
Subscribe now to get my quick FREE Travel Checklist.
I will also send you latest updates on travel tips, food and other travel stories from around the world!





Trackbacks/Pingbacks